InMobi Choice (CMP) Setup
This guide provides all the steps required to create and implement a Cookie Consent page for your domain using InMobi Choice (CMP).
InMobi has been tested and is fully compatible with OCM's tools, complies with the latest Google policies, and is straightforward to implement.
Login / Sign Up
Log in or create a free InMobi account at: https://choice.inmobi.com/login
Theme Configuration
Click "Themes" in the right-hand menu, then select "+ Create Theme" and choose Site (or App if you want the CMP for an App).
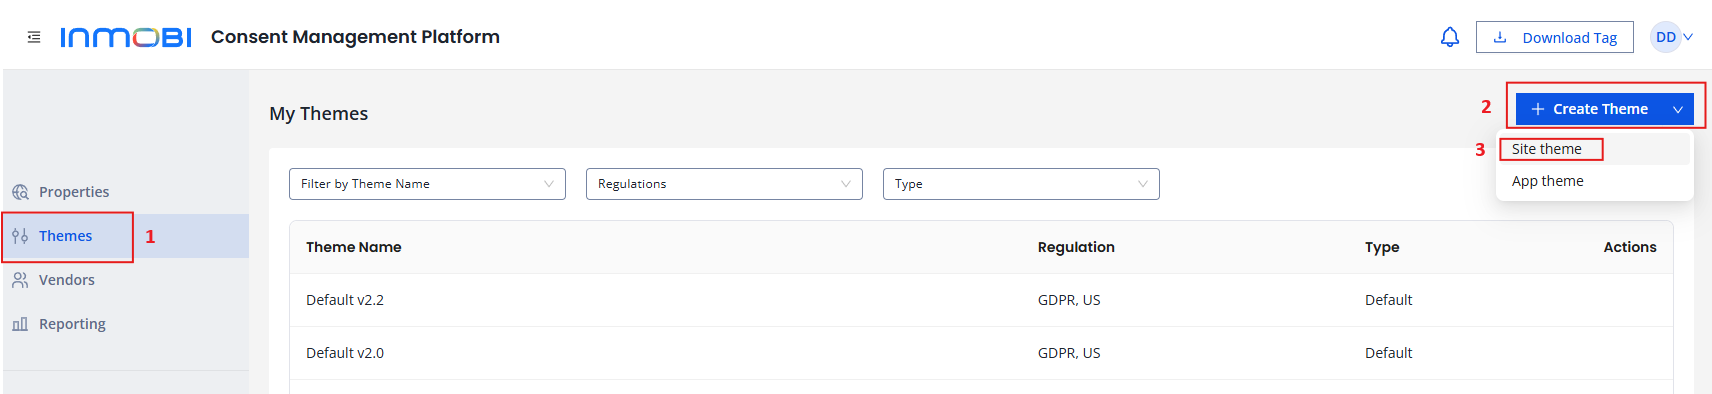
Add a theme name relevant to the domain. Each domain requires its own theme.
Regulation Settings
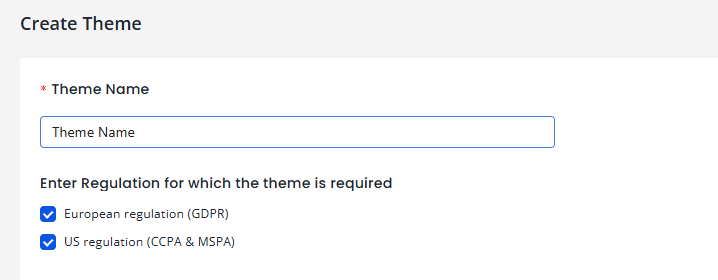
Ensure that European regulation (GDPR) & US regulation are both enabled.
GDPR Consent Settings
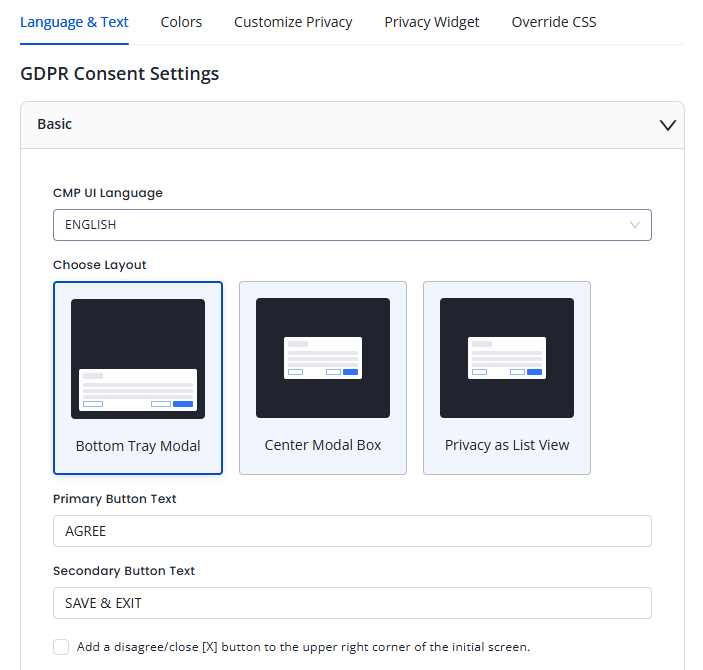
Click "Basic" under "GDPR Consent Settings".
Here you can customize the UI and select the following:
- Under "CMP UI Language", your preferred language
- Under "Choose layout", your preferred layout/look
- The Buttons' text labels
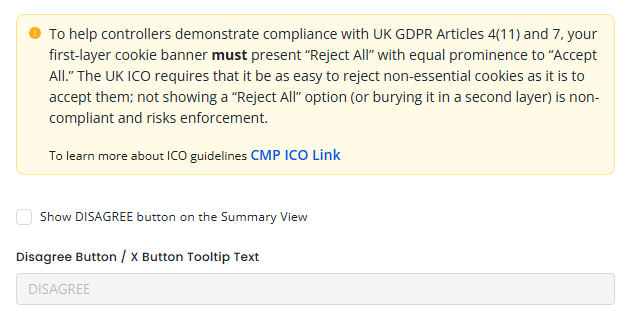
Disagree Button
To help controllers demonstrate compliance with UK GDPR Articles 4(11) and 7, your first-layer cookie banner must present "Reject All" with equal prominence to "Accept All." The UK ICO requires that it be as easy to reject non-essential cookies as it is to accept them; not showing a "Reject All" option (or burying it in a second layer) is non-compliant and risks enforcement.
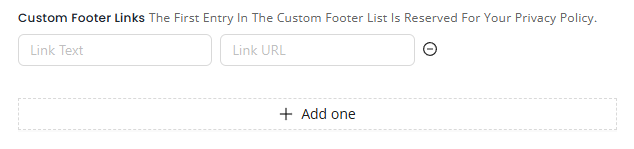
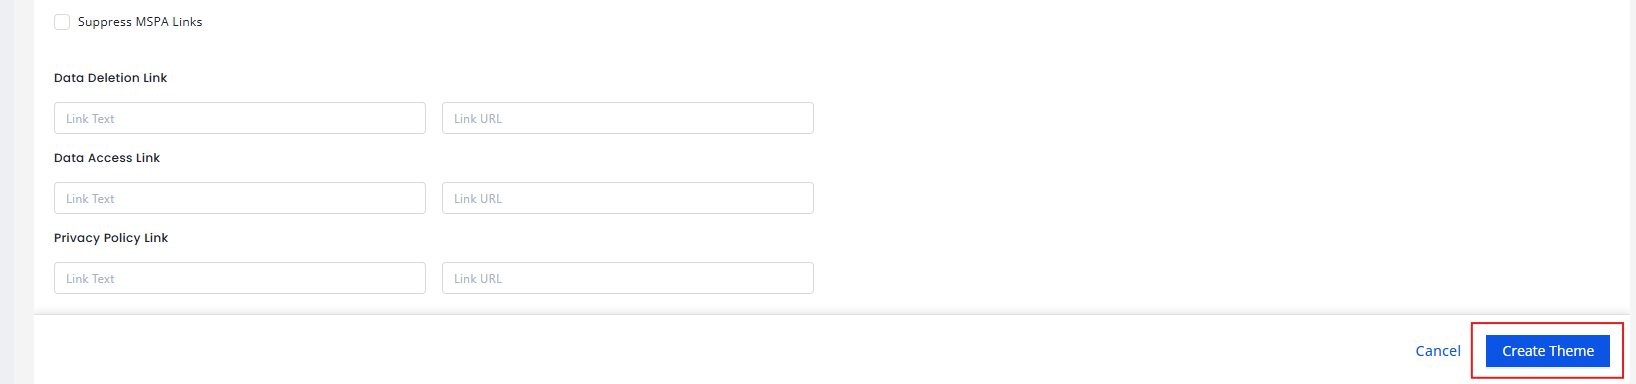
Custom Links
If needed, add any Privacy Policy, Terms, or similar links under Custom Footer Links.
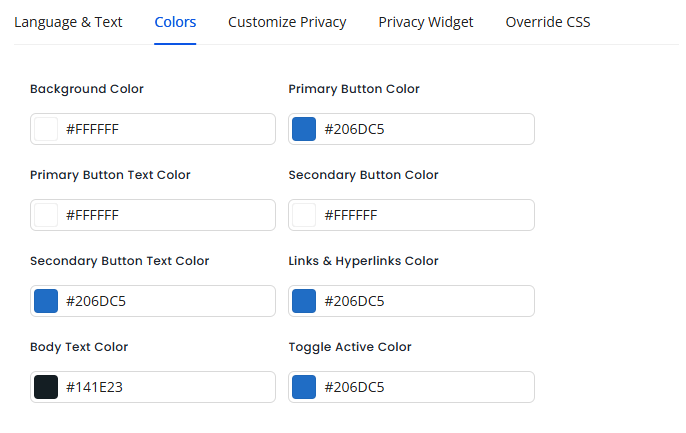
Colors
Under the "Colors" tab, customize the message and banner colors as desired.
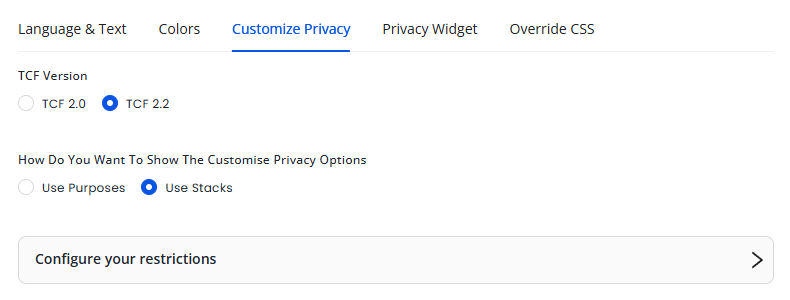
Customize Privacy
- Select TCF 2.3
- Enable Use Stacks
- There is no need to configure any restrictions
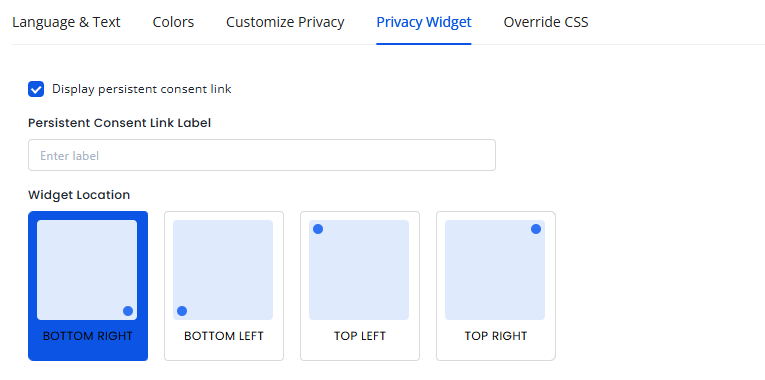
Privacy Widget
Here you can customize the Persistent Consent Link label.
Requirement
This link must be visible and placed where no ads can cause accidental clicks.
Code to trigger it as a pop-up:
__tcfapi('displayConsentUi', 2, function() {});
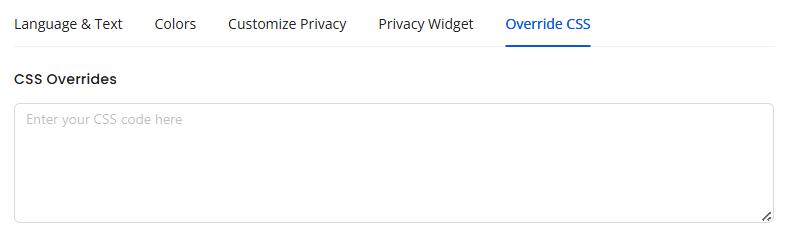
Override CSS
Use the Override CSS section to add custom CSS. CSS overrides can also be placed directly in your domain's source code if preferred.
Finish Theme
Click "Create Theme" at the bottom right.
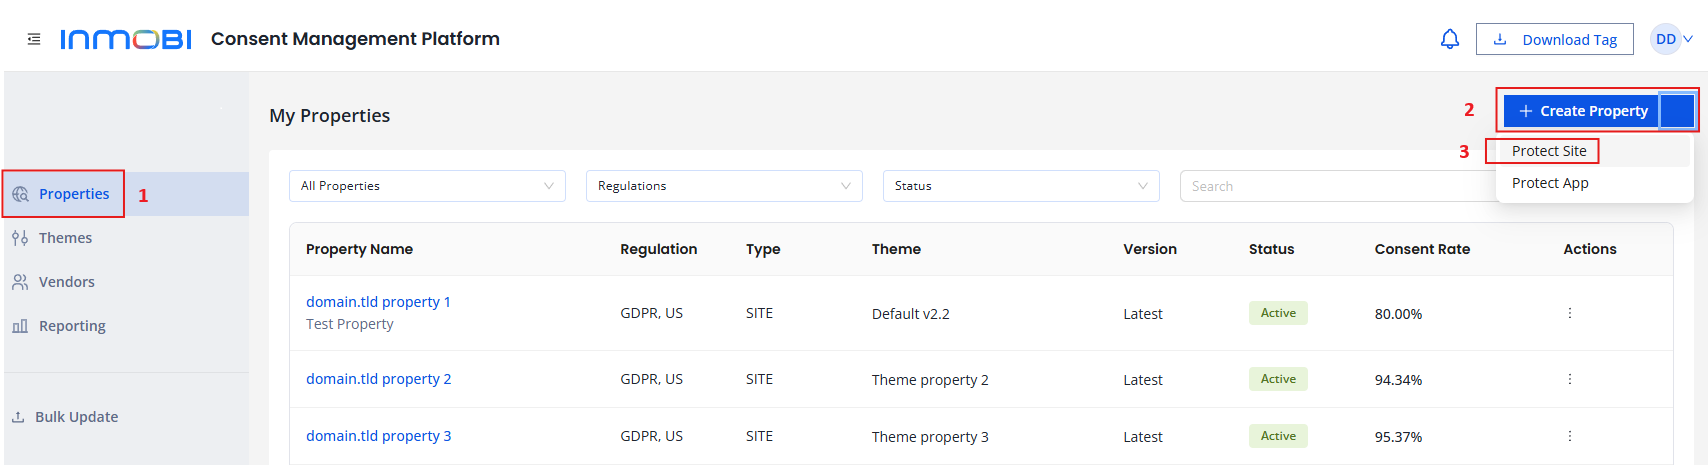
Property Configuration
Click "Properties" in the right-hand menu and select "+ Create Property" > Protect Site or Protect App.
Basic Details
Complete the following fields under the Basic Details tab:
| Field | Description |
|---|---|
| Site URL | Enter the exact URL as shown in the browser, without "https://" |
| Site Name | Free text, usually the domain name |
| Logo URL | URL of the domain's logo (it will resize automatically) |
| CMP Version | Select the latest version |
| Publisher Country | Choose your primary operating country |
Examples for Site URL:
https://www.site.tld→www.site.tldhttps://site.tld→site.tld
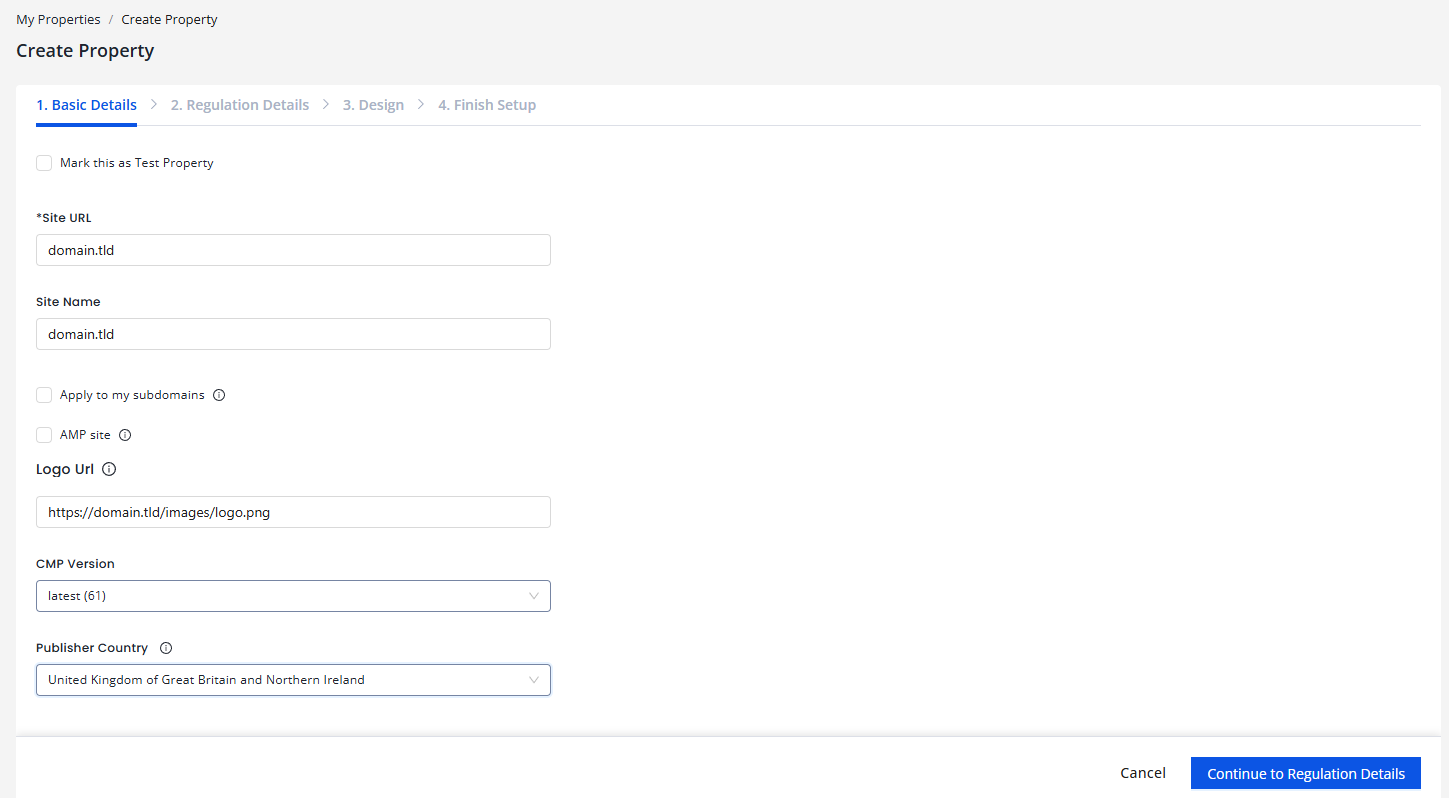
When finished, click "Continue to Regulation Details."
Regulation Details
- Select "Worldwide" on "Which users should be asked for consent?" (The appropriate regulation will apply automatically per user.)
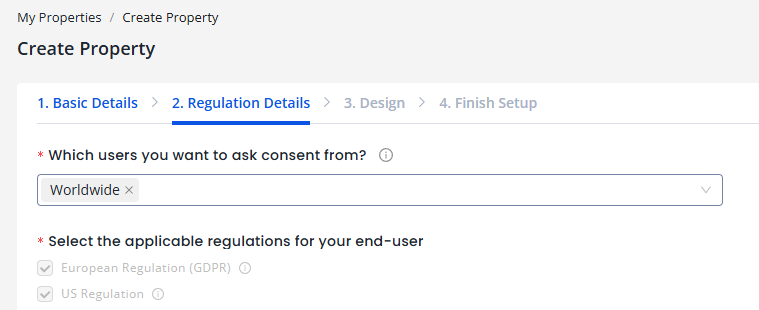
- Select Yes to "Enable Google Basic Consent"
A pop-up will open:
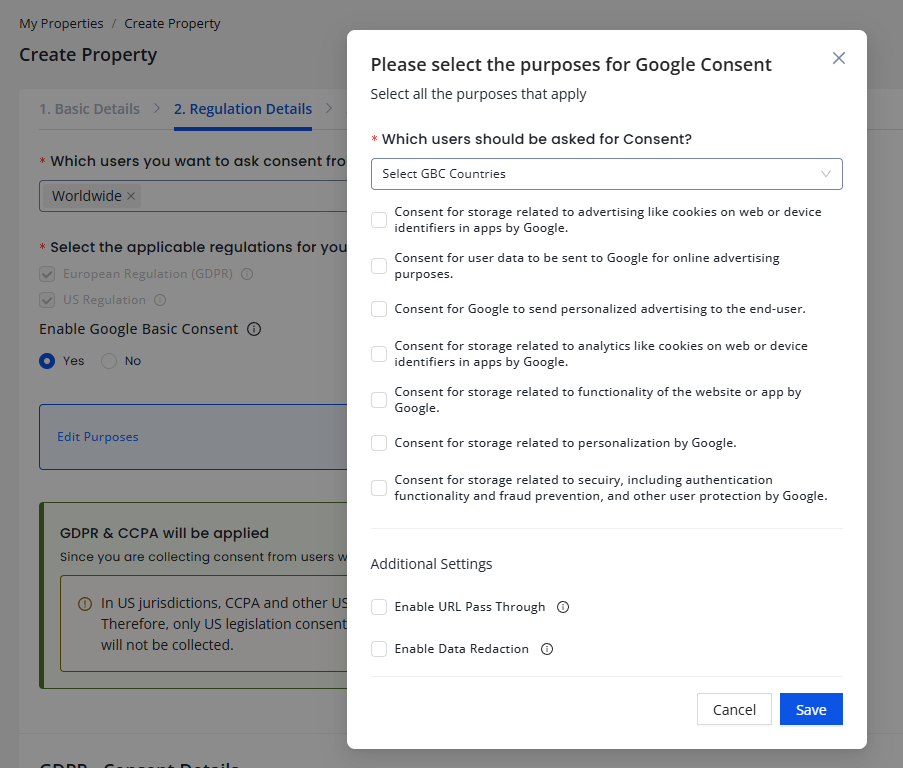
All additional options must be enabled and set to Denied, and all Additional Settings should be selected as shown below:
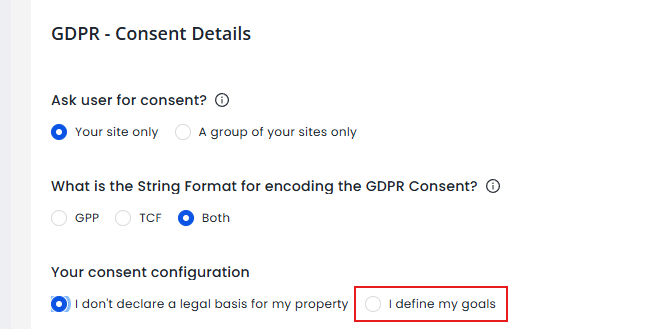
GDPR - Consent Details
Configure the following settings:
- Ask user for consent: Your site only
- String Format: Both
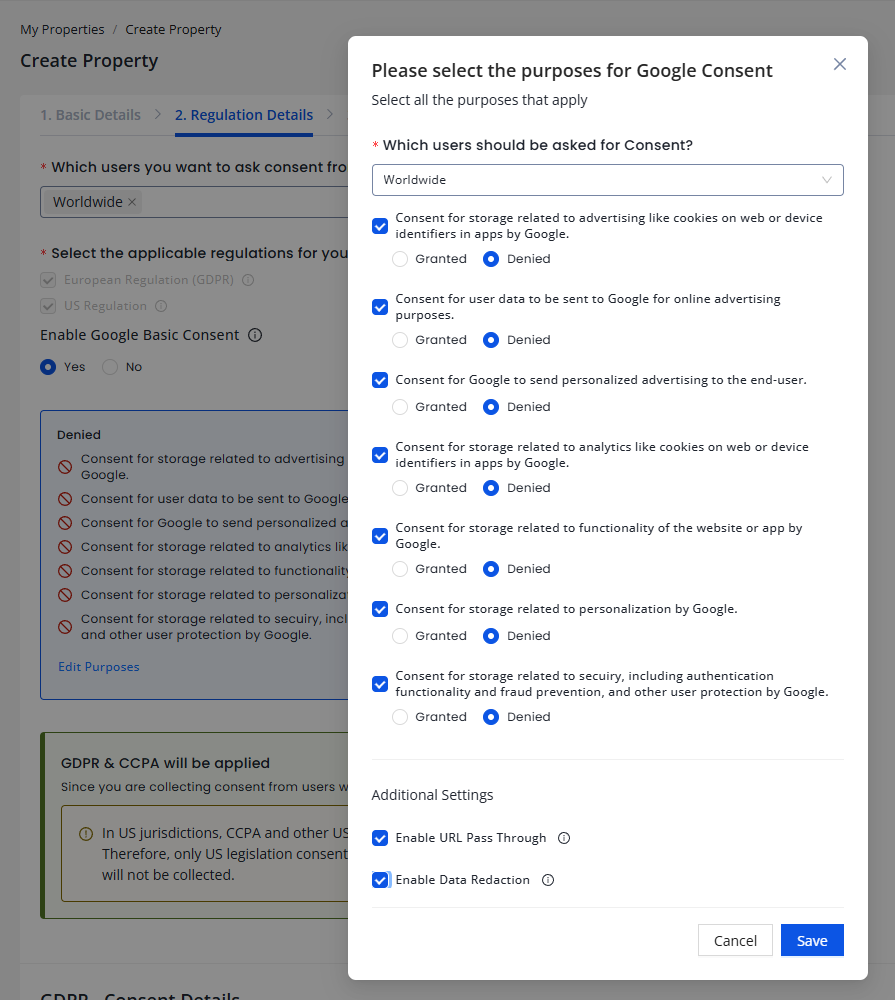
- Under Your consent configuration, choose "I define my goals"
A Customize Purposes window will pop up.
Select all the purposes exactly as shown in the image below, then click Save.
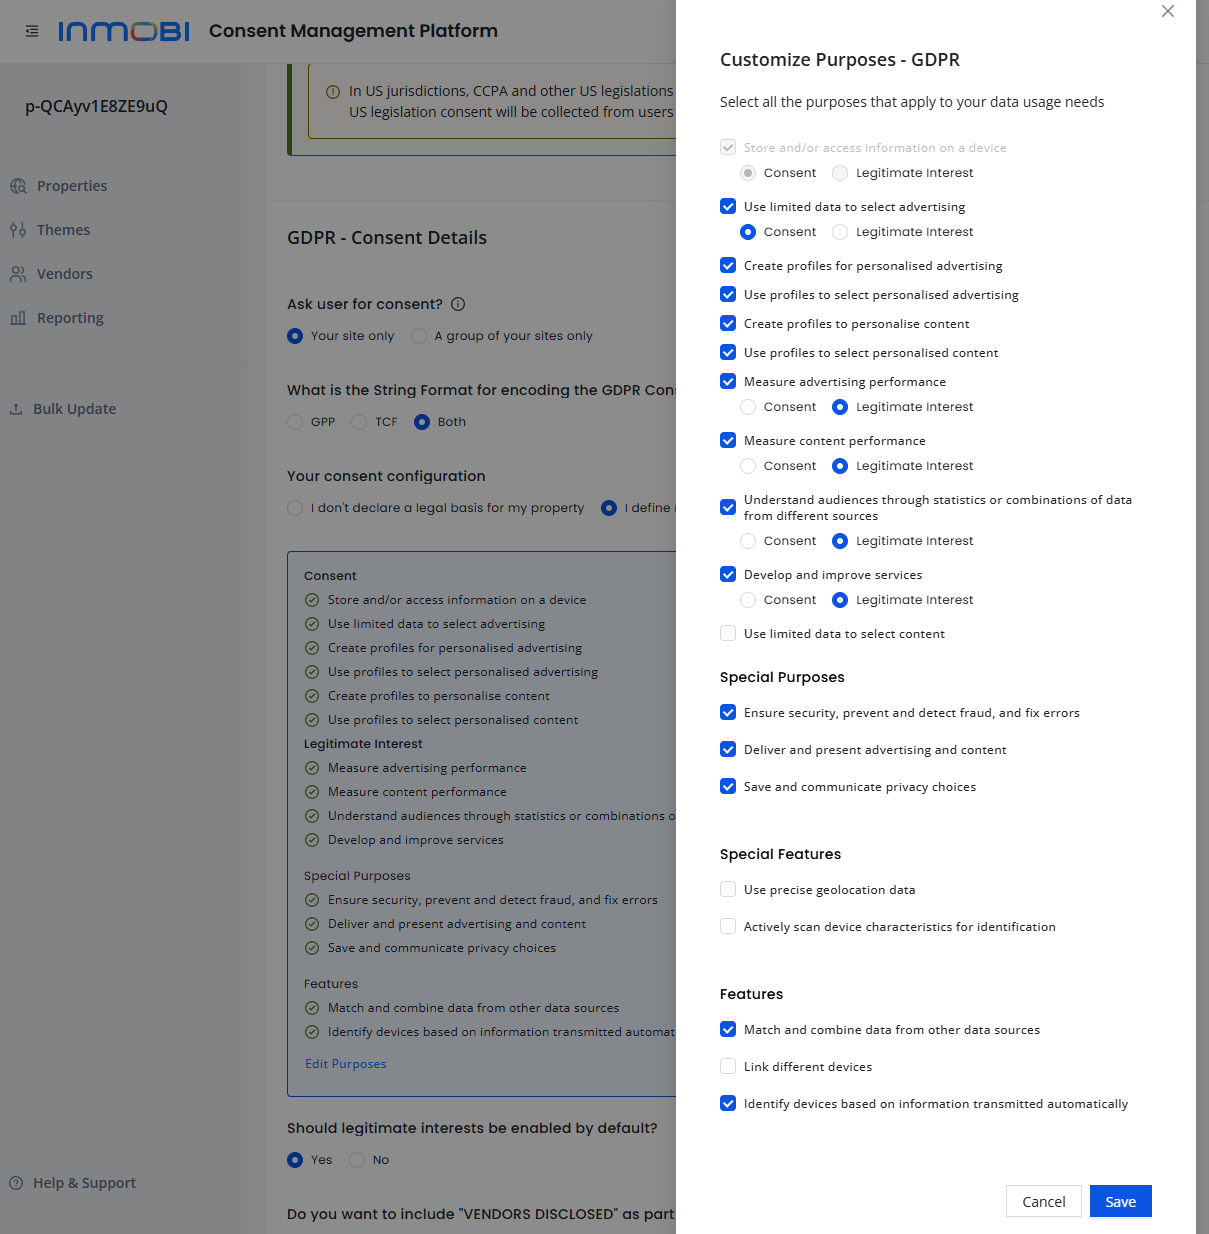
Then configure the remaining items as shown below:
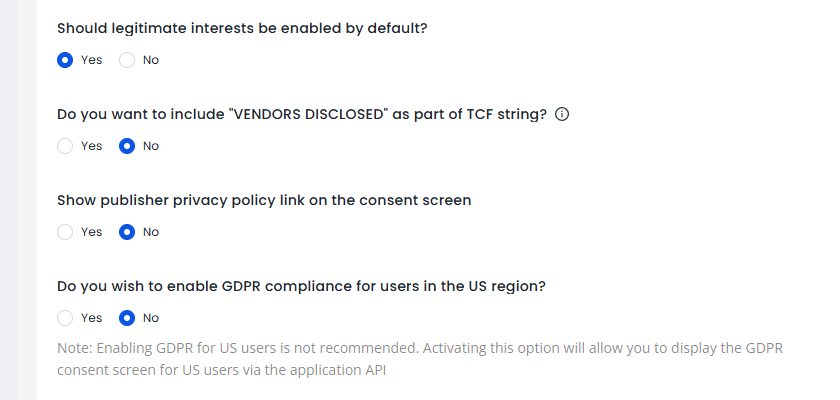
GDPR - Vendor Details
- Show new vendors every: 30 days
- Enable Google Vendors: Yes

MSPA Regulation Settings
Leave the default settings unchanged.
Click "Continue to Design."

Finalize & Publish
- Click "Copy Tag" and place the generated script above your
ocm.jsscript in the website source code - Click "Publish Property" (bottom right) to complete the setup
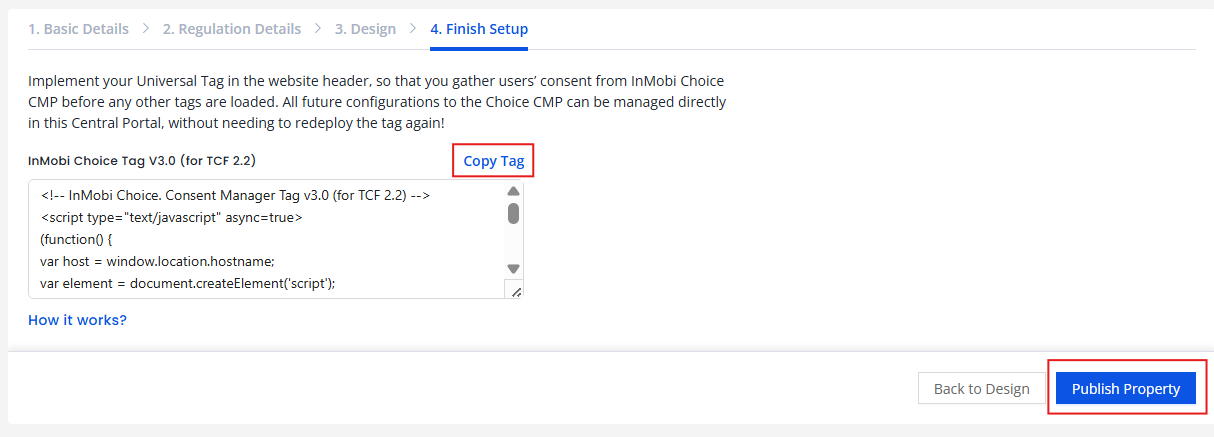
Make sure the InMobi CMP script is placed before the OCM script in your HTML for proper initialization.
Support
If you need assistance or further clarification, please contact us at: [email protected]