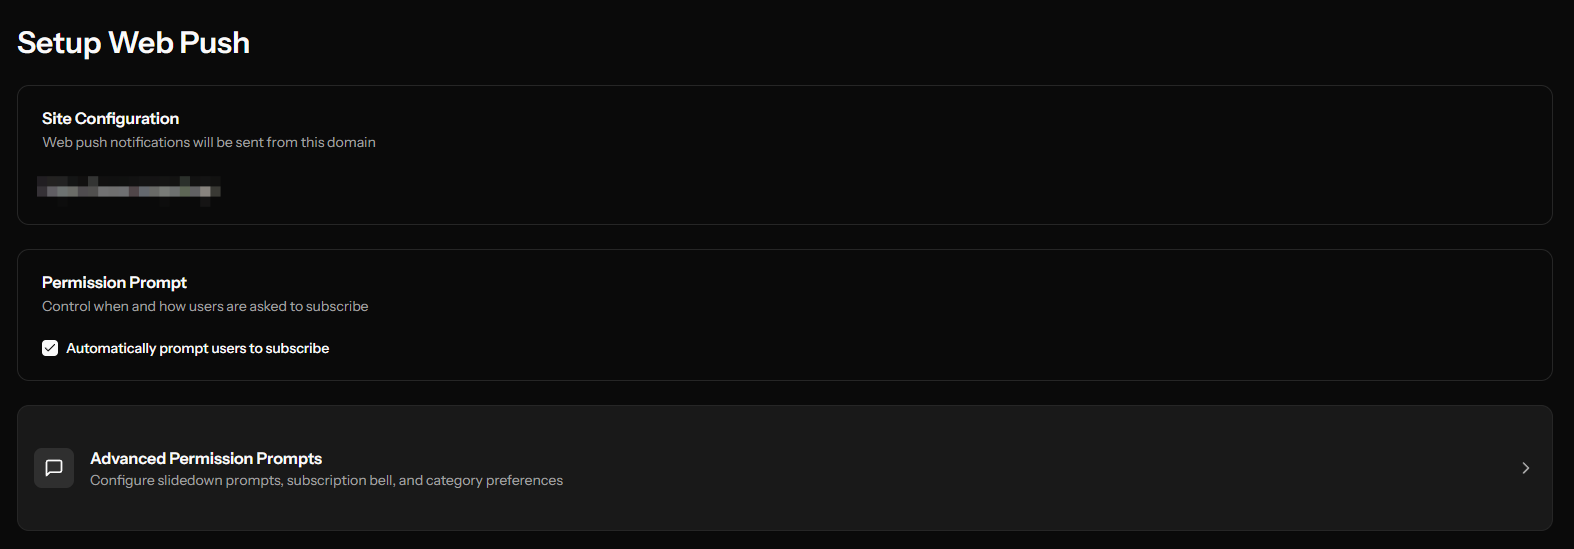
Permission Prompts
Permission prompts are how you ask visitors to subscribe to push notifications. OCM Pulse offers several prompt types to optimize your opt-in rates.
Accessing Prompt Configuration�
- Navigate to your app's Channels section
- Click Settings on the Web Push channel
- Click Configure Advanced Prompts (only visible after initial channel setup)
Available Prompt Types
Native Browser Prompt
The browser's built-in permission dialog. This is the final prompt that always appears before subscribing.
Characteristics:
- Required for actual subscription
- Appearance controlled by the browser
- Can only be shown once per session if denied
- Cannot be customized
Configuration:
- Toggle enabled/disabled only
- No customization options
The native prompt cannot be styled. Use soft prompts (Slidedown, Bell) first to improve conversion rates.
Slidedown Prompt
A soft prompt that slides down from the top of the page. Shows before the native browser prompt.
Benefits:
- More visually appealing than native prompt
- Can be dismissed without blocking future prompts
- Customizable appearance
Configuration Options:
| Setting | Description |
|---|---|
| Enabled | Turn prompt on/off |
| Trigger Mode | Auto (appears automatically) or Manual (triggered by code) |
| Page View Delay | Pages to view before showing |
| Time Delay | Seconds to wait before showing |
| Position | Where the prompt appears: top-left, top-center, top-right, bottom-left, or bottom-right (default: bottom-right) |
| Action Message | Custom message text |
| Accept Button Text | Text for the accept button |
| Accept Button Color | Button background color |
| Deny Button Text | Text for the decline button |
| Deny Button Color | Button background color |
| Icon | Optional icon image |

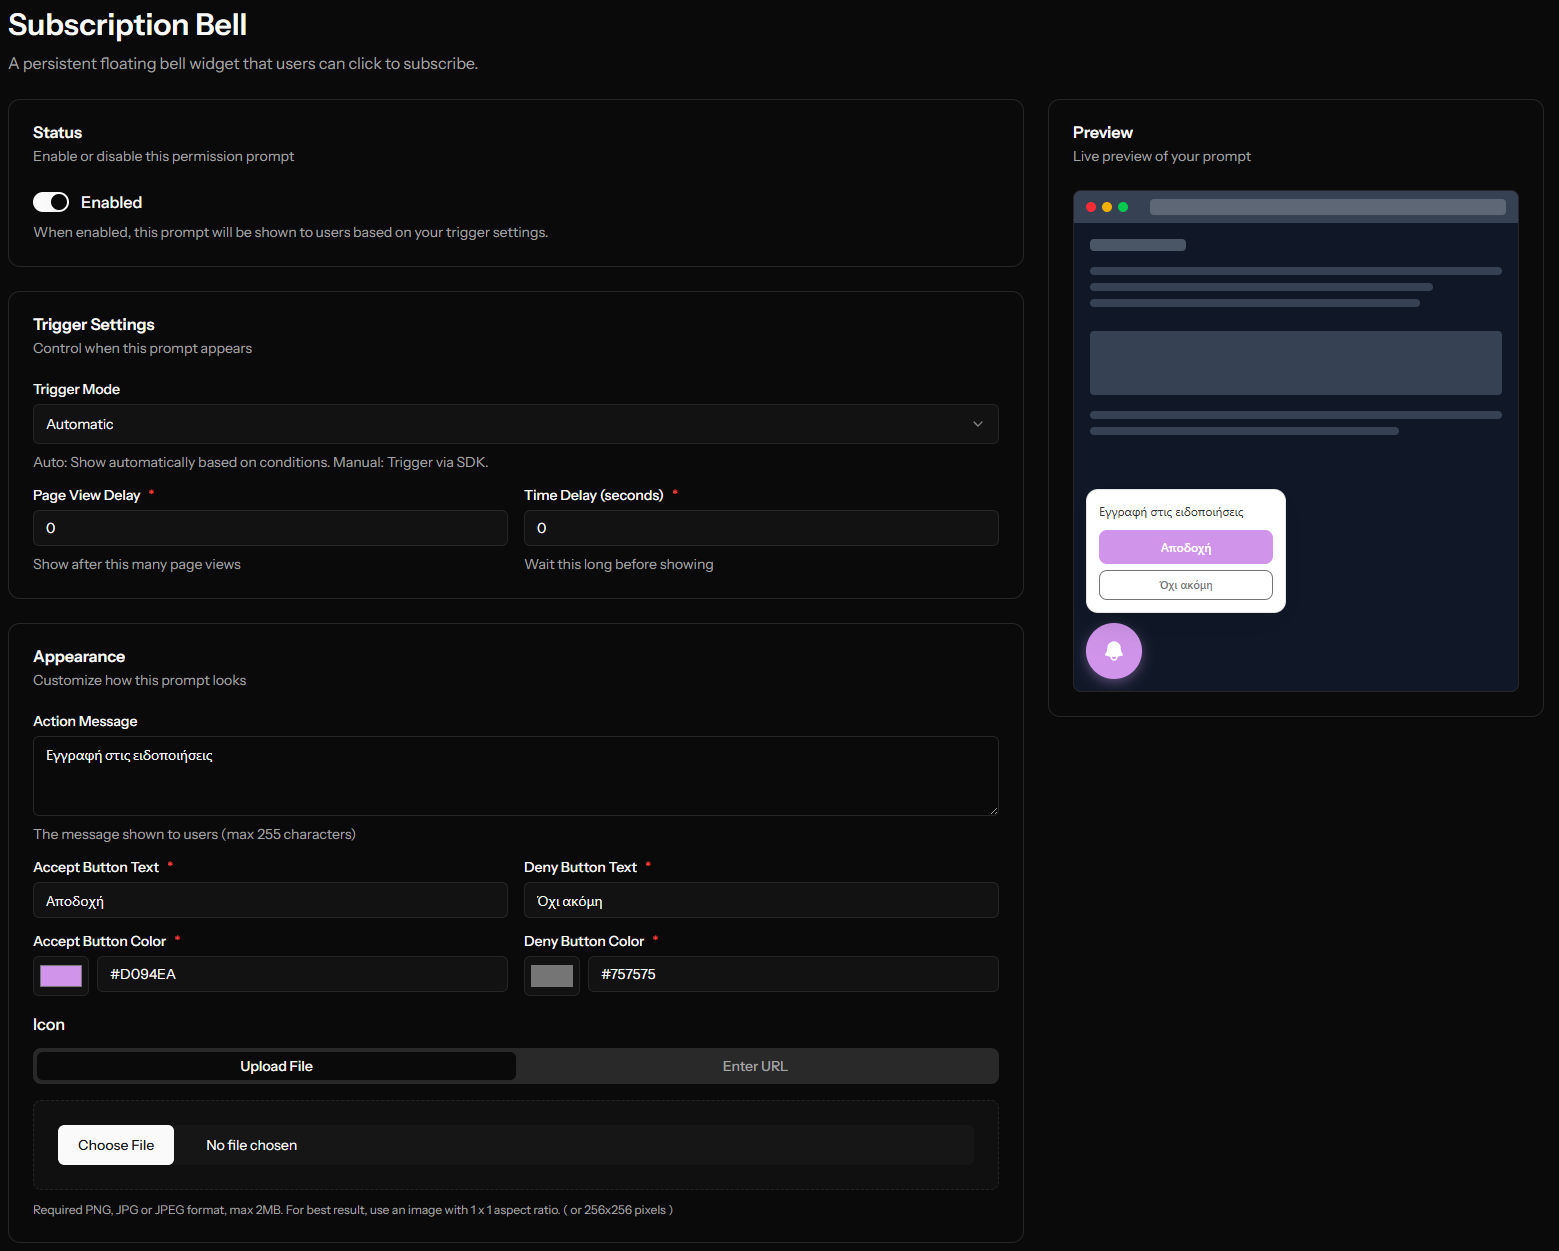
Subscription Bell
A persistent floating button that users can click to subscribe.
Benefits:
- Always visible reminder
- Non-intrusive
- Works well for returning visitors
Configuration Options:
| Setting | Description |
|---|---|
| Enabled | Turn widget on/off |
| Position | Bottom-left or Bottom-right (default: bottom-right) |
| Size | Small, Medium, or Large |
| Trigger Mode | Auto (appears automatically) or Manual |
| Icon | Custom bell icon |
Category Slidedown
A slidedown that lets users choose which types of notifications they want.
Benefits:
- Increases trust by giving users control
- Reduces unsubscribes by targeting interests
- Provides segmentation data automatically
Configuration Options:
- All slidedown options (including Position: top-left, top-center, top-right, bottom-left, or bottom-right) plus:
- Categories - List of notification categories users can select (maximum 10 categories)
Category Settings:
| Setting | Description |
|---|---|
| Name | Display name shown to users |
| Description | Brief explanation of the category |
| Default Checked | Whether pre-selected |
| Display Order | Order in the list (drag to reorder) |

Inline Prompt
A prompt that appears embedded within your page content, rather than overlaying it.
Benefits:
- Natural integration with page design
- Can be placed contextually (e.g., after an article)
- Less intrusive than overlays
Configuration:
- Same options as Slidedown
- Selector (required) - CSS selector where the prompt is embedded (e.g.,
#push-prompt,.subscribe-section; max 255 characters)
Prompt Display Order
When multiple prompts are enabled, they appear in this order:
- Soft Prompt (Slidedown, Bell, Category, or Inline)
- Native Browser Prompt (only after user accepts soft prompt)
The native prompt is only shown after the user indicates interest via a soft prompt.
Trigger Modes
Auto Mode
The prompt appears automatically based on your settings:
- After the specified time delay
- After the required page views
Manual Mode
You control when the prompt appears using JavaScript. Load the SDK with the data-manual attribute, then drive it from the OcmPushInit callback queue:
<script src="https://your-ocm-push-domain.com/sdk/YOUR-APP-ID.js" defer data-manual></script>
<script>
  window.OcmPushInit = window.OcmPushInit || [];
  window.OcmPushInit.push(function (OcmPush) {
    document.getElementById('notify-me').addEventListener('click', function () {
      // Queue the prompt type(s) you want and then run the SDK
      OcmPush.resetPrompts().showSlidedown();
      OcmPush.run();
    });
  });
</script>
See the full SDK API reference for all available prompt methods and events.
Best Practices
Don't Prompt Immediately
Users who just arrived don't know your site yet. Wait until they've engaged:
- Set a 5-10 second delay
- Require 2-3 page views
Use Soft Prompts First
The native browser prompt can only be shown once per session. Use slidedowns or bells to:
- Explain the value of subscribing
- Let users decline without permanent consequences
Keep Messages Clear
Good examples:
- "Get notified about new posts"
- "Never miss a sale - get alerts first"
Avoid:
- "Click allow" (too vague)
- Long paragraphs (users won't read them)
Match Your Brand
Customize button colors to match your site's design for a cohesive experience.
Use Categories Wisely
Only use Category Slidedown if you have distinct notification types:
- Breaking News vs. Daily Digest
- Product Updates vs. Promotions
- Different topic areas
Test Different Approaches
Try different prompt types and timings. Use your dashboard analytics to see:
- Prompt impression rates
- Accept/deny ratios
- Best performing configurations
Prompt Flow Diagram
User Visits Site
       ↓
[Time/Page Delay]
       ↓
Soft Prompt Shown (Slidedown/Bell/Category)
       ↓
   ┌───┴───┐
   ↓       ↓
Accept   Deny
   ↓       ↓
Native  [Retry Later
Prompt   if enabled]
   ↓
   ┌───┴───┐
   ↓       ↓
Allow   Block
   ↓       ↓
Subscribed  Blocked
            (permanent)
Next Steps
- Install the SDK
- Send your first notification
- Create categories for category slidedown