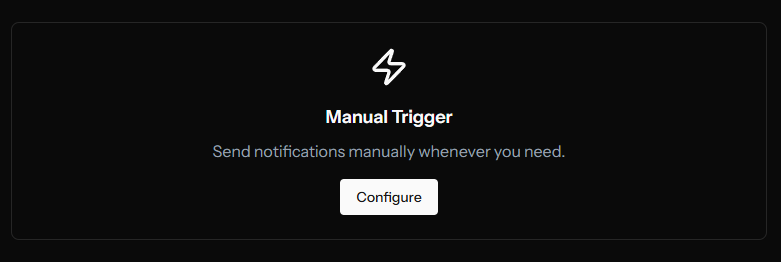
Manual Trigger
The Manual Trigger lets you create and send notifications on-demand through the dashboard.
Accessing Manual Trigger
- Navigate to your app
- Click Triggers
- Click Configure on the Manual Trigger card
Creating a Notification
Basic Information
Delivery Name (Required)
An internal name for this notification. Used for tracking and filtering in the deliveries list.
Examples:
- "January Newsletter"
- "Flash Sale 2024"
- "New Feature Announcement"
Category (Optional)
Assign a category for organization. Categories help you:
- Filter deliveries in the list
- Analyze performance by type
- Match subscriber preferences
When a category is selected, a "Replace previous notifications in this category" checkbox appears. Enabling this uses the category's tag key as a topic, so new notifications replace older ones in the same category on the subscriber's device.
Notification Content
Title (Required)
The headline of your notification. Keep it short and compelling.
| Limit | Best Practice |
|---|---|
| 255 characters max | 40-50 characters ideal |
Good examples:
- "New: Dark Mode is Here"
- "50% Off Everything Today"
- "Breaking: Election Results"
Body (Required)
The main message text. Expand on your title with key details.
| Limit | Best Practice |
|---|---|
| 255 characters max | 80-100 characters ideal |
Good examples:
- "Enable dark mode in settings. Your eyes will thank you!"
- "Use code FLASH50 at checkout. Ends midnight."
URL (Required)
Where users go when they click the notification. Must be a valid URL.
Tips:
- Use UTM parameters for tracking:
?utm_source=push&utm_campaign=flash-sale - Link to relevant content, not just your homepage
- Ensure the page loads quickly on mobile
Hero Image (Optional)
A large image displayed in the notification. Supported on Chrome, Edge, and some mobile devices.
| Requirement | Value |
|---|---|
| Aspect Ratio | 2:1 recommended |
| Format | PNG, JPG, or JPEG |
| Max Size | 2 MB |
You can upload a file or paste an image URL.
Using Templates
If you have message templates configured:
- Click the Template dropdown
- Select a template
- Fill in any required variables
- The notification fields will be populated
Templates are great for consistent branding and recurring notification types.
AI Content Assistant
Generate or improve notification content using AI. The assistant has three tabs:
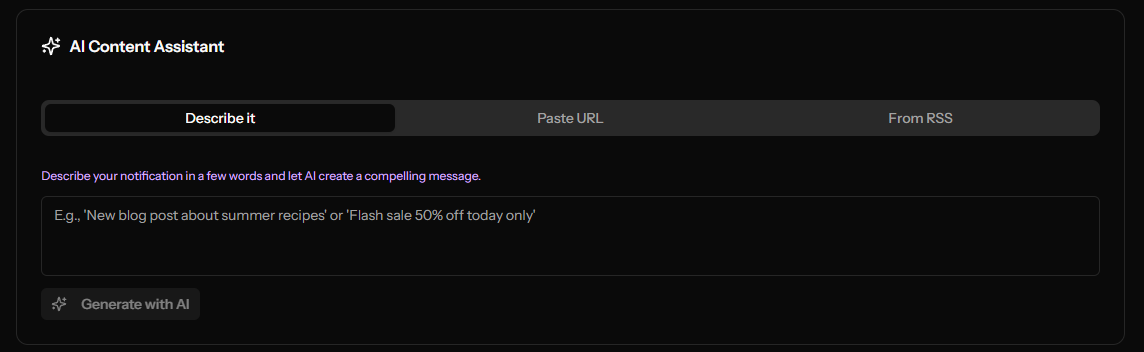
Describe It
- Click the AI button
- Select the "Describe it" tab
- Enter a brief description of your notification
- AI generates an optimized title and body
Paste URL
- Select the "Paste URL" tab
- Paste an article URL
- The system extracts the title, body, and image from the page
- After auto-filling, click "Refine with AI" to optimize the title and body for push notifications
From RSS
- Select the "From RSS" tab
- Pick from recent RSS feed items
- Content (title, body, image) is auto-filled from the selected item
- After auto-filling, click "Refine with AI" to optimize the content for push notifications
Target Audience
Segment (Optional)
Choose who receives this notification:
- All Subscribers - Send to everyone
- Specific Segment - Send only to matching subscribers
Segments must be created beforehand in the Segments section.
Scheduling
Choose when to send the notification:

Send Immediately
Notification is sent as soon as you click the send button.
Schedule for Later
- Select "Scheduled"
- Choose a date
- Choose a time (in 15-minute increments: :00, :15, :30, :45)
The notification will be sent at the specified time in your timezone.
If you have other notifications already scheduled for the same day, you'll see a warning. This helps prevent notification fatigue.
Frequency Cap
If your app has frequency capping enabled, you'll see the Ignore frequency cap option.
| Setting | Description |
|---|---|
| Unchecked | Respects cap, some users may not receive |
| Checked | All targeted subscribers receive it |
Use this sparingly for truly important notifications.
Advanced Options
Click Advanced Options to expand additional settings.
Action Buttons
Add up to 2 clickable buttons to your notification.
| Field | Limit |
|---|---|
| Button Title | 48 characters |
| Button URL | Valid URL |
Example:
- Button 1: "Shop Now" →
https://site.com/sale - Button 2: "Learn More" →
https://site.com/about
TTL (Time-To-Live)
How long the notification remains valid.
| Option | Use Case |
|---|---|
| Default (24 hours) | Normal notifications |
| 1 hour | Time-sensitive deals |
| 6 hours | Daily updates |
| 24 hours | Standard content |
| 3 days | Important announcements |
| 7 days | Major updates |
If a subscriber's device is offline longer than the TTL, they won't receive the notification.
Require Interaction (Persistent Notification)
When enabled, the notification stays visible until the user clicks or dismisses it.
This setting only works in Chrome and Edge browsers. Firefox and Safari ignore this setting and will auto-dismiss notifications regardless.
Best for:
- Important alerts
- Action-required notifications
Avoid for:
- Casual updates
- High-frequency notifications

Sending the Notification
- Review all settings in the preview panel
- Click Send Notification (or Schedule for scheduled)
- Confirm in the dialog if prompted
- You'll be redirected to the deliveries list
After Sending
Monitor your notification in the Deliveries section:
- Real-time status updates
- Delivery success/failure counts
- Click tracking and rates
Tips for Effective Notifications
Do
- Keep titles under 50 characters
- Include a clear call-to-action
- Link to relevant, fast-loading pages
- Test on mobile devices
- Use segmentation for relevance
Don't
- Send too frequently
- Use ALL CAPS or excessive punctuation
- Be vague about what users will find
- Send at inconvenient times
- Ignore your analytics