Web Push Installation
This guide explains how to install the OCM Pulse SDK on your website to enable push notifications.
Prerequisites
- Web Push channel must be configured
- Access to your website's source code or CMS
- HTTPS enabled on your website (required for push notifications)
- Your site's domain must be saved on your app — the SDK's backend calls are validated against this domain
Installation Steps
Step 1: Upload the Service Worker
The service worker is a script that runs in the background to receive and display push notifications. Each app ships with its own worker file pre-configured for that app.
- Go to Channels → Web Push → Install
- Click Download Service Worker — this downloads
ocm-push-worker.js - Upload the file to your website at the path configured on the channel (default: the root directory)

Default path: https://yoursite.com/ocm-push-worker.js
- The service worker must be served from the same origin as your website (not from a CDN or different subdomain).
- It must be reachable at the exact Service Worker Path you configured on the channel (default
/ocm-push-worker.js). - A service worker at
/subfolder/ocm-push-worker.jscan only control pages under/subfolder/, so it must sit at the root unless you have customized the Service Worker Scope. - The file must be served with JavaScript
Content-Type, not as an HTML error page.
Step 2: Add the SDK Script
The SDK is served directly from OCM Push at a URL unique to your app:
https://<your-ocm-push-domain>/sdk/<your-app-identifier>.js
All configuration (app identifier, prompts, welcome notification, default icons, etc.) is embedded inside this file — you don't pass any options on the page.

Pick one of two setups:
Basic Setup (recommended)
Add this single script tag to the <head> of every page where users can subscribe:
<script src="https://your-ocm-push-domain.com/sdk/YOUR-APP-ID.js" defer></script>
With this single line, the SDK will:
- Wait for the DOM and (if applicable) a GDPR CMP consent signal
- Show any permission prompts you enabled on the channel
- Register the service worker
- Create and store the subscription on your OCM Push app
- Fire the welcome notification (if enabled)
You can also override a few settings at the page level before the SDK boots by assigning to window.__OCM_PUSH_OVERRIDES__:
<script>
  window.__OCM_PUSH_OVERRIDES__ = {
    service_worker_path: '/sw.js', // use a custom worker path (e.g. to keep an existing filename)
  };
</script>
<script src="https://your-ocm-push-domain.com/sdk/YOUR-APP-ID.js" defer></script>
Advanced Setup (manual control)
Add data-manual to the script tag to stop the SDK from auto-running, then drive it from the OcmPushInit callback queue. This is the officially supported pattern for running the SDK alongside your own UI:
<script src="https://your-ocm-push-domain.com/sdk/YOUR-APP-ID.js" defer data-manual></script>
<script>
  window.OcmPushInit = window.OcmPushInit || [];

  window.OcmPushInit.push(function (OcmPush) {
    // Listen for SDK events
    OcmPush.on('onPermissionChange', function (permission) {
      console.log('Permission changed:', permission);
    });

    OcmPush.on('onSubscriptionChange', function (subscription) {
      console.log('Subscription changed:', subscription);
    });

    // Configure prompts at runtime and queue them up (chainable)
    OcmPush
      .setPromptConfig('slidedown', {
        action_message: 'Get notified about new articles!',
      })
      .showSlidedown()
      .showBell();

    // Kick off the SDK — registers the service worker, shows prompts,
    // creates the subscription on OCM Push, etc.
    OcmPush.run();
  });
</script>
The callback queue pattern is used (rather than a ready event) because the SDK may load asynchronously. Any callbacks pushed to OcmPushInit before the SDK arrives are replayed in order once it initializes.
Step 3: Deploy and Test
- Deploy the service worker file and SDK script to production.
- Open your website in an incognito / private window.
- Wait for the prompt you configured (respecting delay and page-view thresholds).
- Click Allow and confirm the browser's native permission dialog.
- Back in OCM Push, check Subscriptions on your app — your new subscriber should appear within a few seconds.
- From Triggers → Manual, send yourself a test notification.
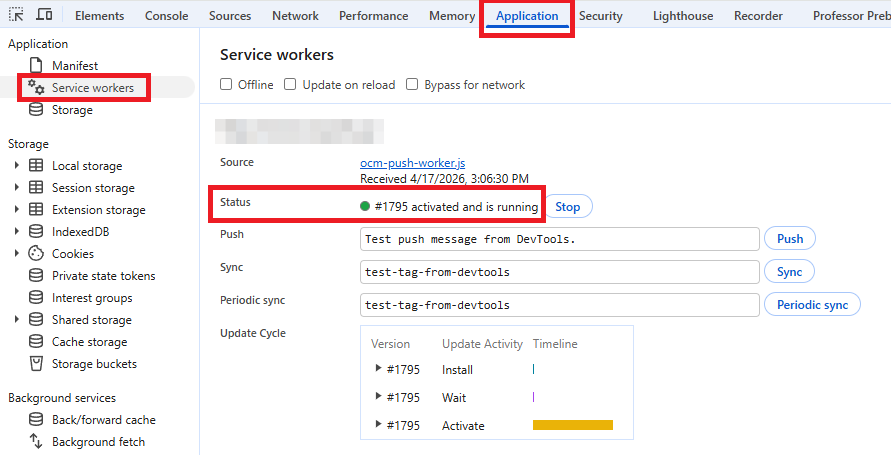
Useful verification steps in DevTools (F12):
- Console — look for
Initializing OcmPush SDK v…log. - Application → Service Workers — verify
ocm-push-worker.jsis registered and activated. - Application → Local Storage / Cookies — the SDK stores a user identifier for the subscription lifecycle.
SDK Public API Reference
When using Advanced Setup, the callback receives an OcmPush object. All state-mutating methods return OcmPush so they can be chained.
Events
| Event | Payload | Description |
|---|---|---|
onPermissionChange | 'default' | 'granted' | 'denied' | Fired when the browser notification permission changes. |
onSubscriptionChange | { userId, appId } | null | Fired when the user subscribes, resubscribes, or unsubscribes. |
onSwVersionReceived | string | Fired once the service worker reports its version. |
OcmPush.on('onSubscriptionChange', (subscription) => { /* ... */ });
OcmPush.off('onSubscriptionChange', handler);
Configuration
| Method | Description |
|---|---|
configure(overrides) | Deep-merges overrides into the embedded app config (e.g. debugMode, categories). |
setPromptConfig(type, options) | Override settings for a specific prompt type before showing it. type is 'slidedown' | 'native' | 'bell' | 'category_slidedown' | 'inline'. |
setCategories(categoriesArray) | Programmatically set the categories the user is subscribed to. |
resetPrompts() | Clear the queued prompt array so you can rebuild it. |
Showing Prompts
These methods queue a prompt of the given type with trigger_mode: 'manual'. Call run() afterwards to actually display them.
| Method | Prompt |
|---|---|
showSlidedown() | Branded slidedown prompt |
showBell() | Floating bell widget |
showCategorySlidedown() | Slidedown with category checkboxes |
showInline() | Inline prompt rendered into a DOM selector (requires setPromptConfig('inline', { selector: '#my-div' }) first) |
showNative() | Native browser permission dialog |
Running and State
| Method | Returns | Description |
|---|---|---|
run() | Promise<SubscriptionData> | Executes the full subscription flow (permission → service worker → subscription). |
getPermissionStatus() | 'default' | 'granted' | 'denied' | Reads Notification.permission. |
getSubscription() | { userId, appId } | null | Returns the current subscription, or null if not subscribed. |
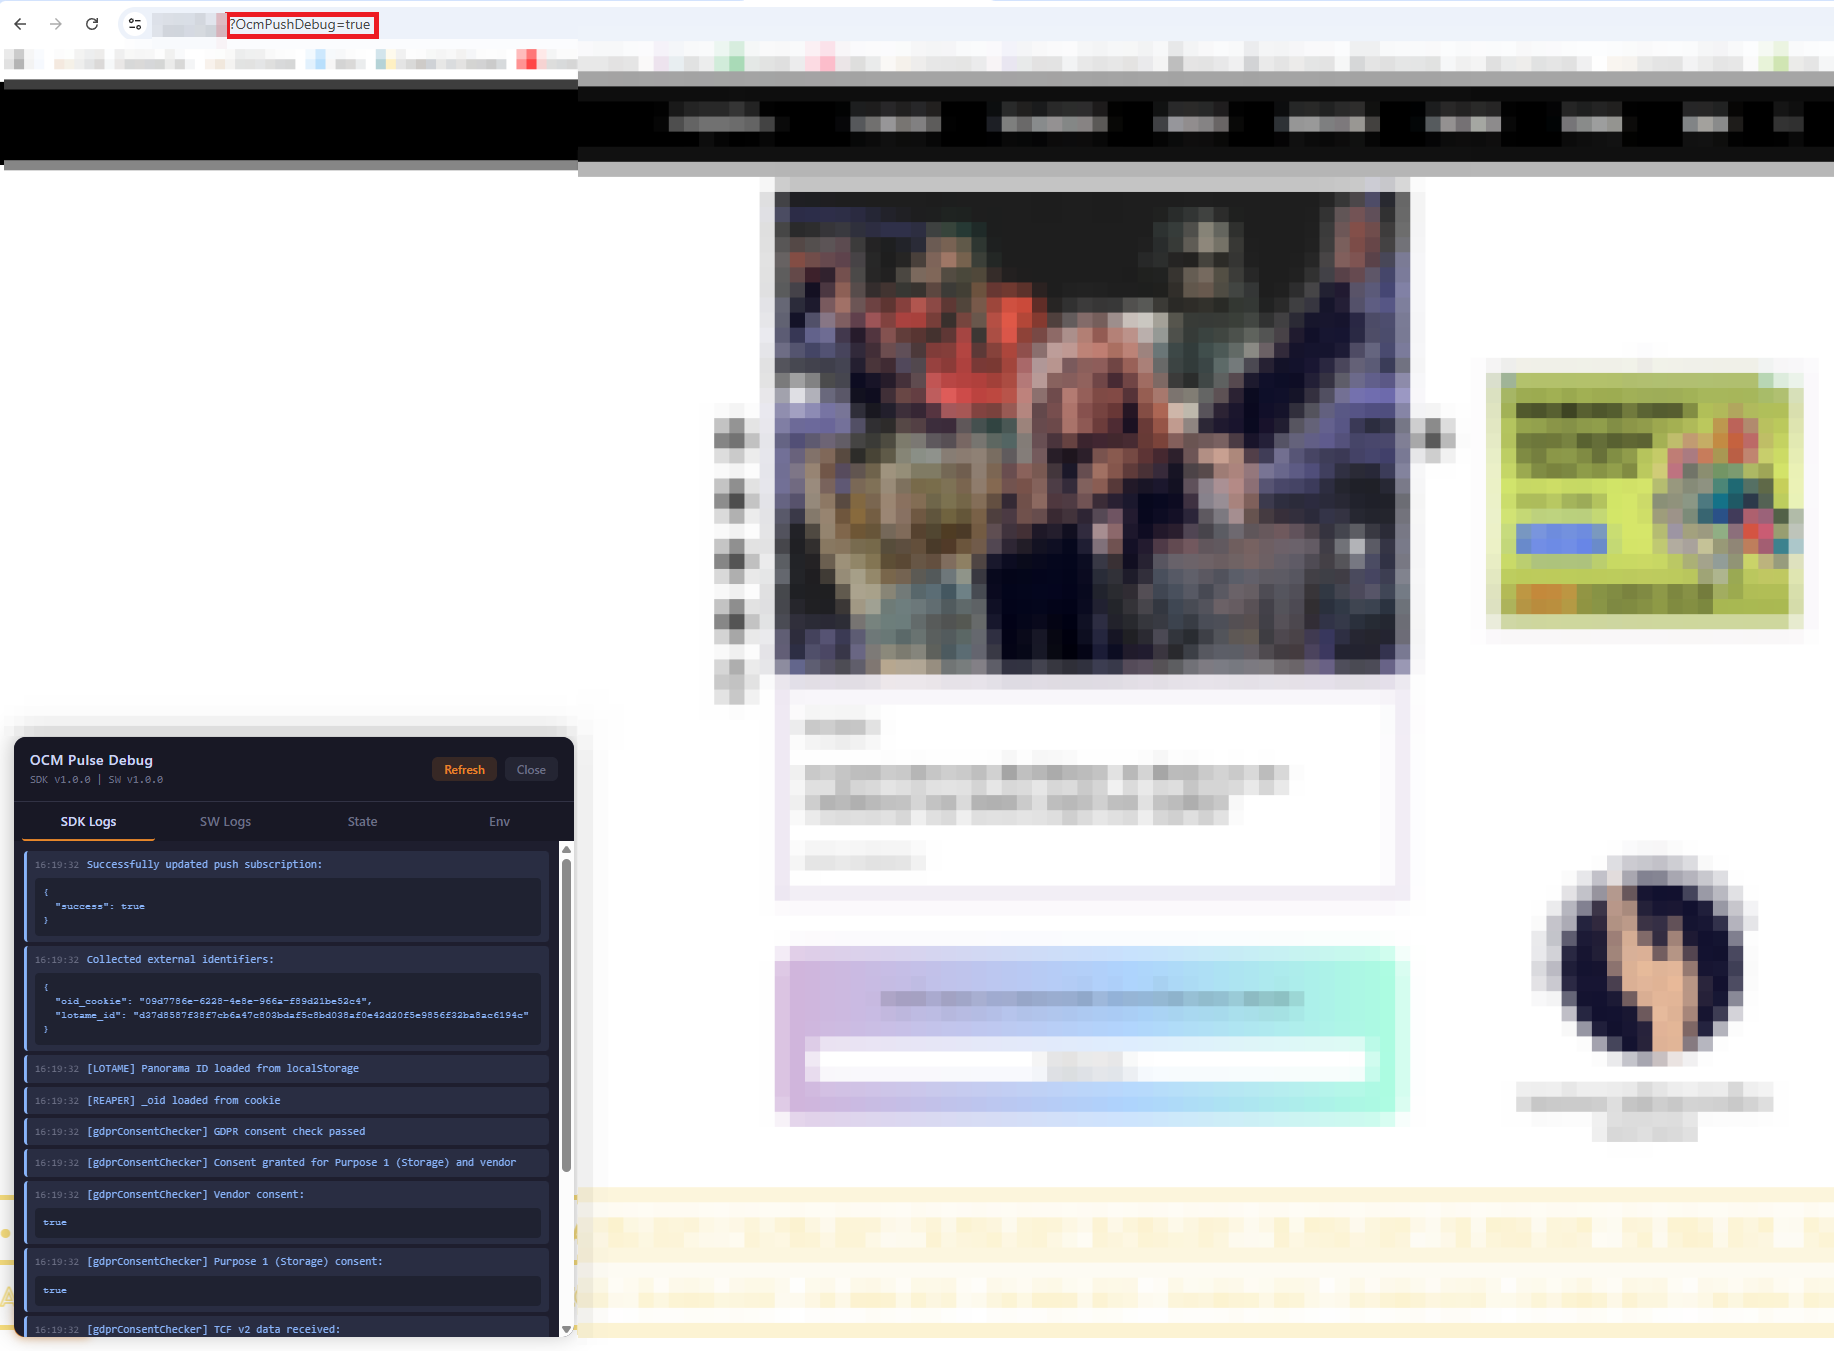
Debug Panel
Append ?OcmPushDebug=true to any page URL that loads the SDK to open a floating debug panel with Logs, State, and Env tabs. Errors are also logged to the browser console so you can jump to the stack frame.
Troubleshooting
Service Worker Not Registering
Symptoms: no prompt, errors in console.
Solutions:
- Confirm the worker is reachable at the exact path configured on the channel (
Service Worker Path). Opening it in a new tab should show JavaScript, not HTML. - Make sure the file is on the same origin as your pages (no CDN, no different subdomain).
- Ensure the site runs on HTTPS.
- Clear stale workers from DevTools → Application → Service Workers → Unregister, then reload.
Permission Prompt Not Appearing
Symptoms: SDK loads but no prompt shown.
Solutions:
- Check your prompt delay and page-view thresholds on the channel — they need to be met first.
- If a CMP is installed on your site and GDPR applies, the SDK waits for consent to Purpose 1 (Storage). Until consent is given the SDK pauses — this is expected.
- The user may have already accepted or declined — test in incognito mode.
- Open the debug panel (
?OcmPushDebug=true) and look at the Logs tab for "blocked" or "skipped" messages.
Subscribers Not Appearing in the Dashboard
Symptoms: users accept but the Subscriptions list stays empty.
Solutions:
- Verify the Site URL on the app matches the origin the SDK is loaded from. The OCM Push backend validates this and rejects requests with CORS errors from unknown domains.
- Check the browser Network tab for failing requests to
/api/...— CORS or 4xx errors indicate a domain/config mismatch. - Confirm the app identifier in the script URL is correct.
Notifications Not Received
Symptoms: subscribed successfully but nothing arrives.
Solutions:
- Check browser notification settings (system-level and site-level).
- Check Do Not Disturb / Focus modes on the device.
- Verify the delivery shows as Success in the Deliveries list.
- Some browsers quietly drop pushes when tabs are fully closed for extended periods — try with the browser running.
"Push notifications are blocked"
- Click the lock / site-info icon next to the URL.
- Find the notifications permission.
- Change from Block to Ask or Allow.
- Reload the page.
Migrating from Another Provider
If your site already has push notifications through OneSignal, Firebase, or another vendor, follow the dedicated Migrating from an Existing Push Provider guide — it covers how to replace the old service worker without losing users who have already granted permission.
Platform-Specific Notes
Chrome / Edge (Chromium)
- Full support on desktop and Android (Chrome 42+, Edge 17+).
- All prompt types, action buttons,
require_interaction, andvibratework.
Firefox
- Desktop and Android supported.
- Some features (such as
require_interaction) are ignored.
Safari
- macOS Safari 16+ supports standard Web Push.
- iOS / iPadOS Safari 16.4+ supports Web Push, but only when the site has been installed to the Home Screen as a web app. The SDK detects iOS Safari and shows an "Install to Home Screen" guide modal instead of the prompt when appropriate.
Opera / Brave
- Chromium-based, behave like Chrome. Brave may hide notifications by default depending on shields.
Next Steps
After installation:
- Send a test notification
- Set up RSS automation (optional)
- Create audience segments (optional)