Getting Started Guide
This step-by-step guide walks you through setting up OCM Pulse for the first time, from creating your app to sending your first notification.
Overview
By the end of this guide, you'll have:
- Created an app for your website
- Configured the Web Push channel
- Installed the SDK on your website
- Collected your first subscriber
- Sent your first notification
Estimated time: 15-30 minutes
Prerequisites
Before you begin:
- Access to OCM Pulse dashboard
- Access to your website's code or CMS
- HTTPS enabled on your website
- A modern browser for testing
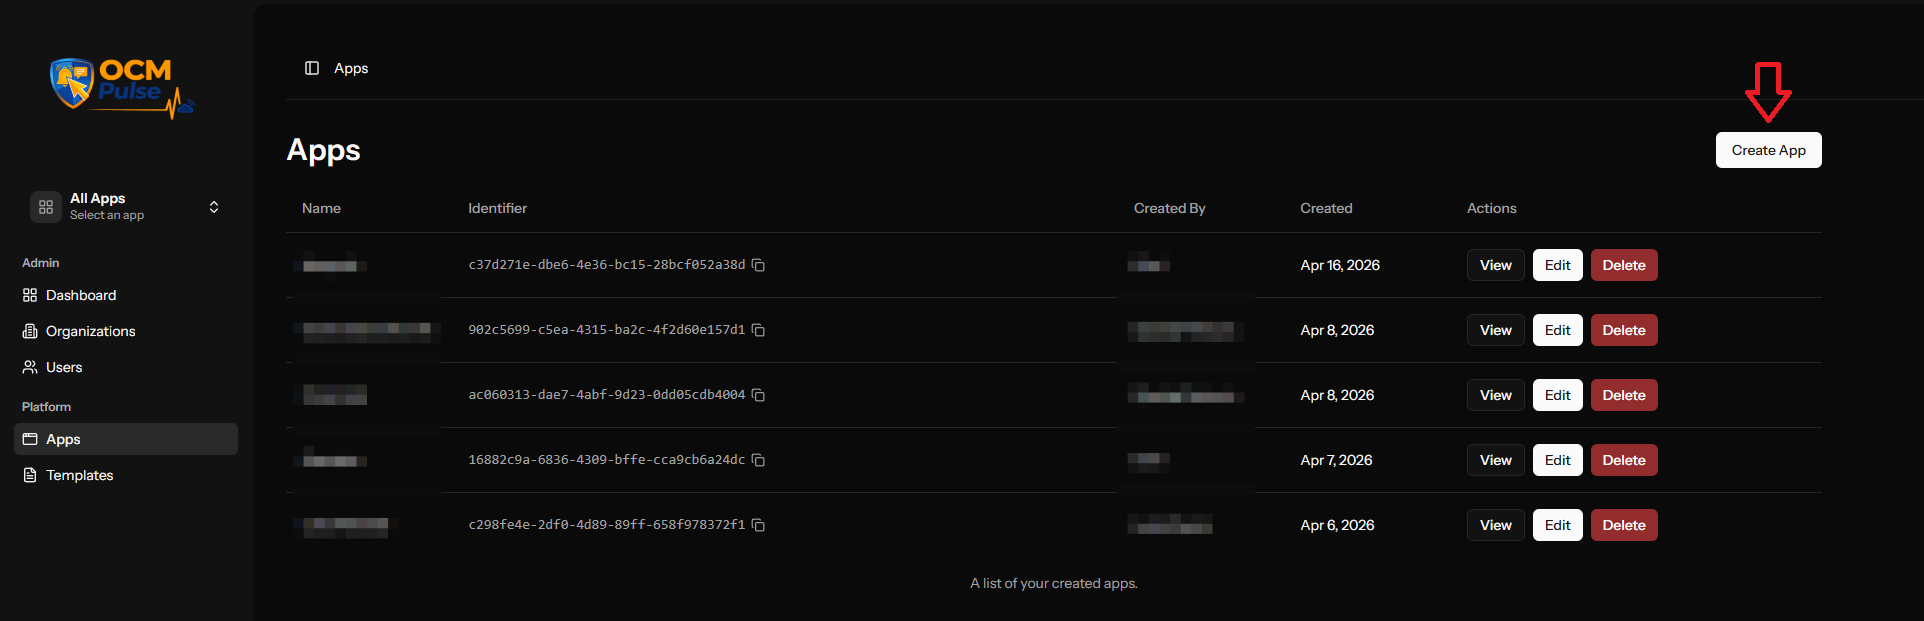
Step 1: Create Your App
1.1 Navigate to Apps
After logging in, click Apps in the main navigation.
1.2 Create New App
Click Create App in the top right corner.
1.3 Enter App Details
| Field | What to Enter |
|---|---|
| Name | Your website name (e.g., "My Blog") |
| Site Domain | Full URL (e.g., https://myblog.com) |
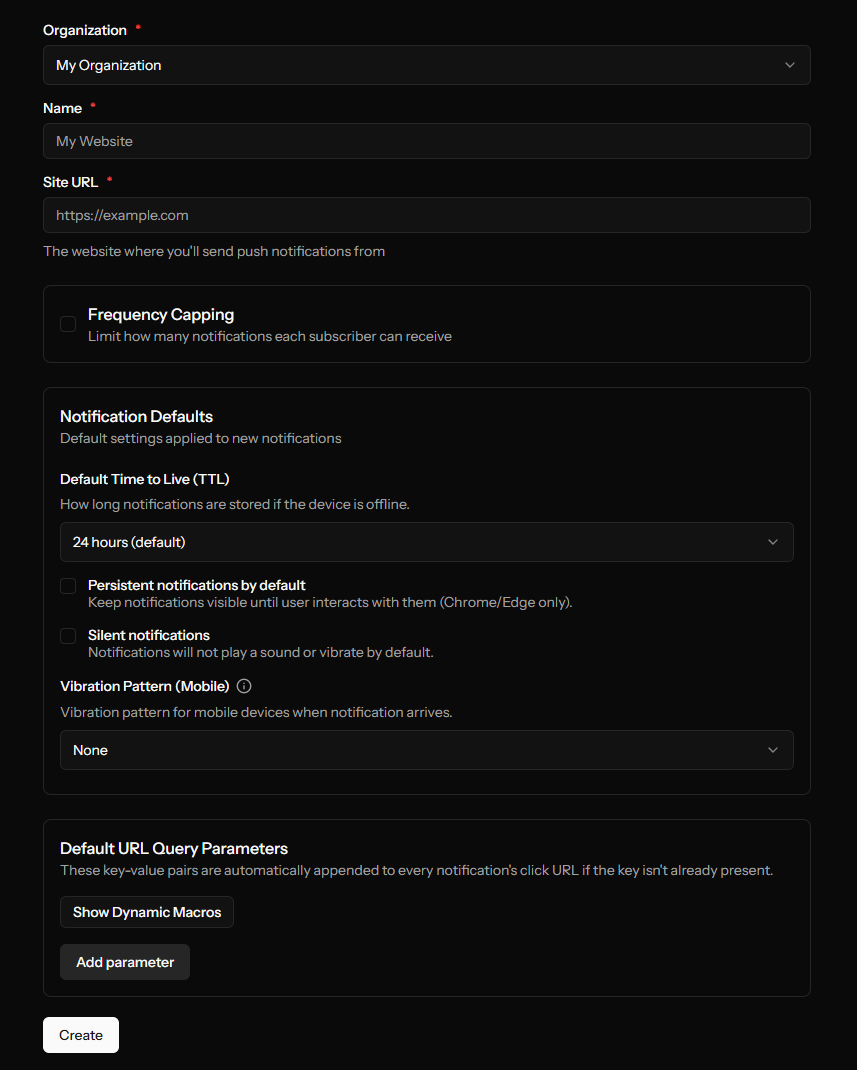
1.4 Configure Settings (Optional)
For your first app, you can skip advanced settings:
- Leave frequency capping disabled
- Use default notification settings
1.5 Create the App
Click Create App. You'll be taken to the Channels page.
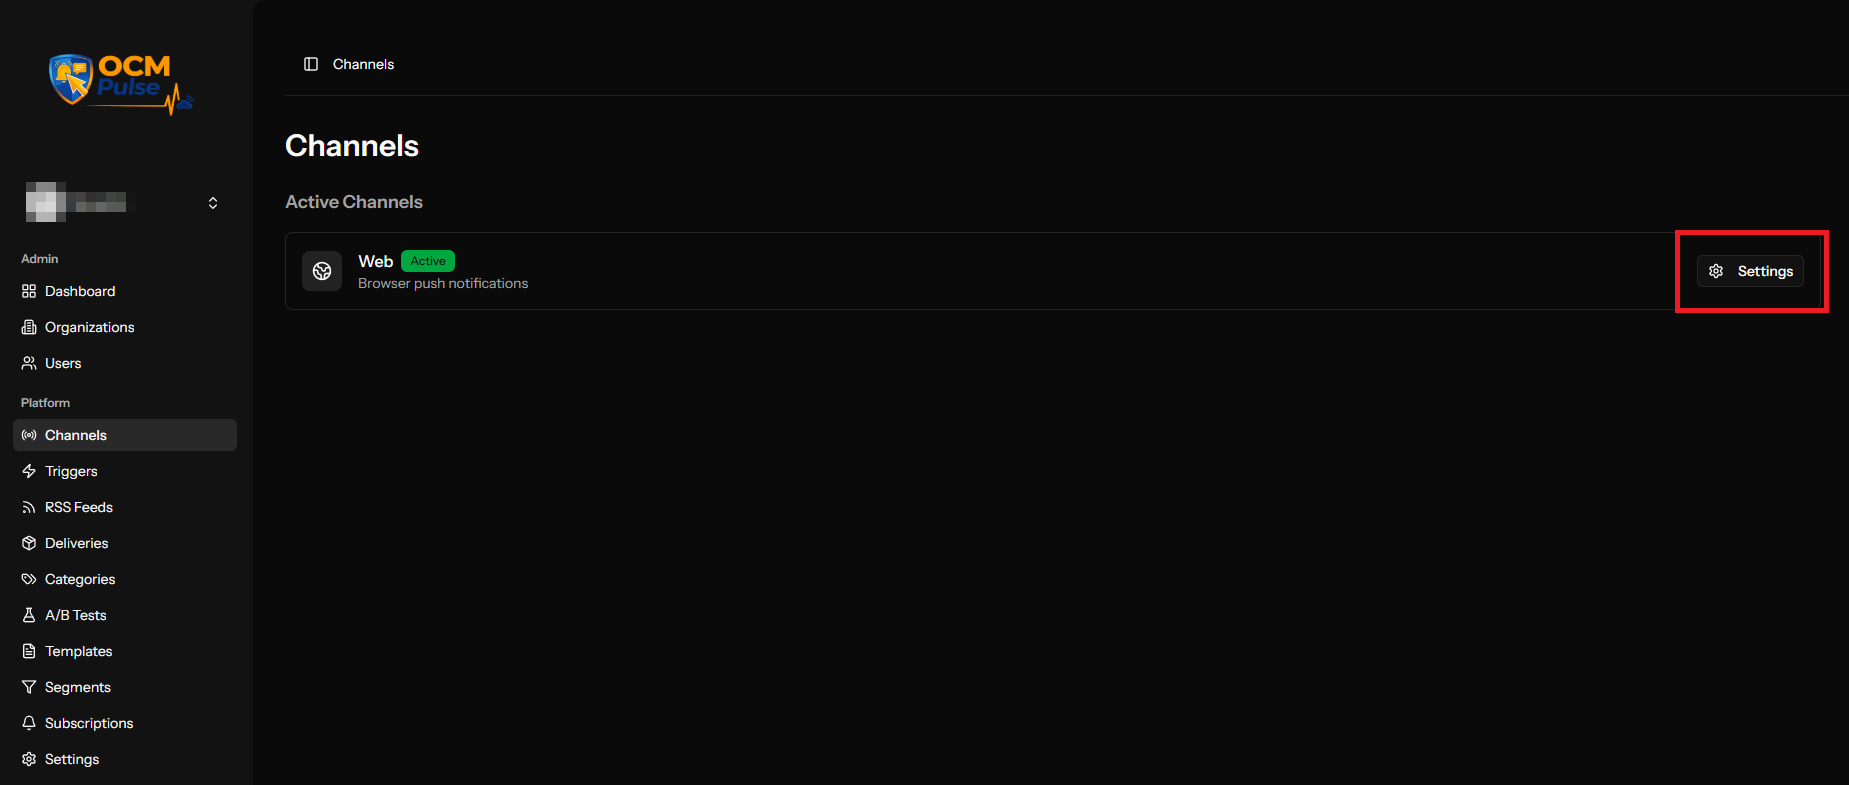
Step 2: Configure Web Push Channel
2.1 Start Configuration
On the Channels page, click Settings on the Web Push card.
2.2 Permission Prompt Settings
For getting started quickly:
| Setting | Recommended Value |
|---|---|
| Auto Prompt | Enabled |
| Delay | 5 seconds |
| Page Views | 3 (default) |
2.3 Welcome Notification (Optional)
Enable to greet new subscribers:
| Field | Example |
|---|---|
| Enable | Yes |
| Title | "Welcome!" |
| Message | "Thanks for subscribing to our updates" |
| URL | Leave blank or use your homepage |
2.4 Default Assets (Optional)
Upload your notification icon:
- Size: 256×256 pixels
- Format: PNG or JPG
You can skip this and use browser defaults initially.
2.5 Save Configuration
Click Save. You'll be taken to the Installation page.
Step 3: Install the SDK
3.1 Download Service Worker
- On the Installation page, click Download Service Worker
- Save the
ocm-push-worker.jsfile - Upload it to your website's root directory
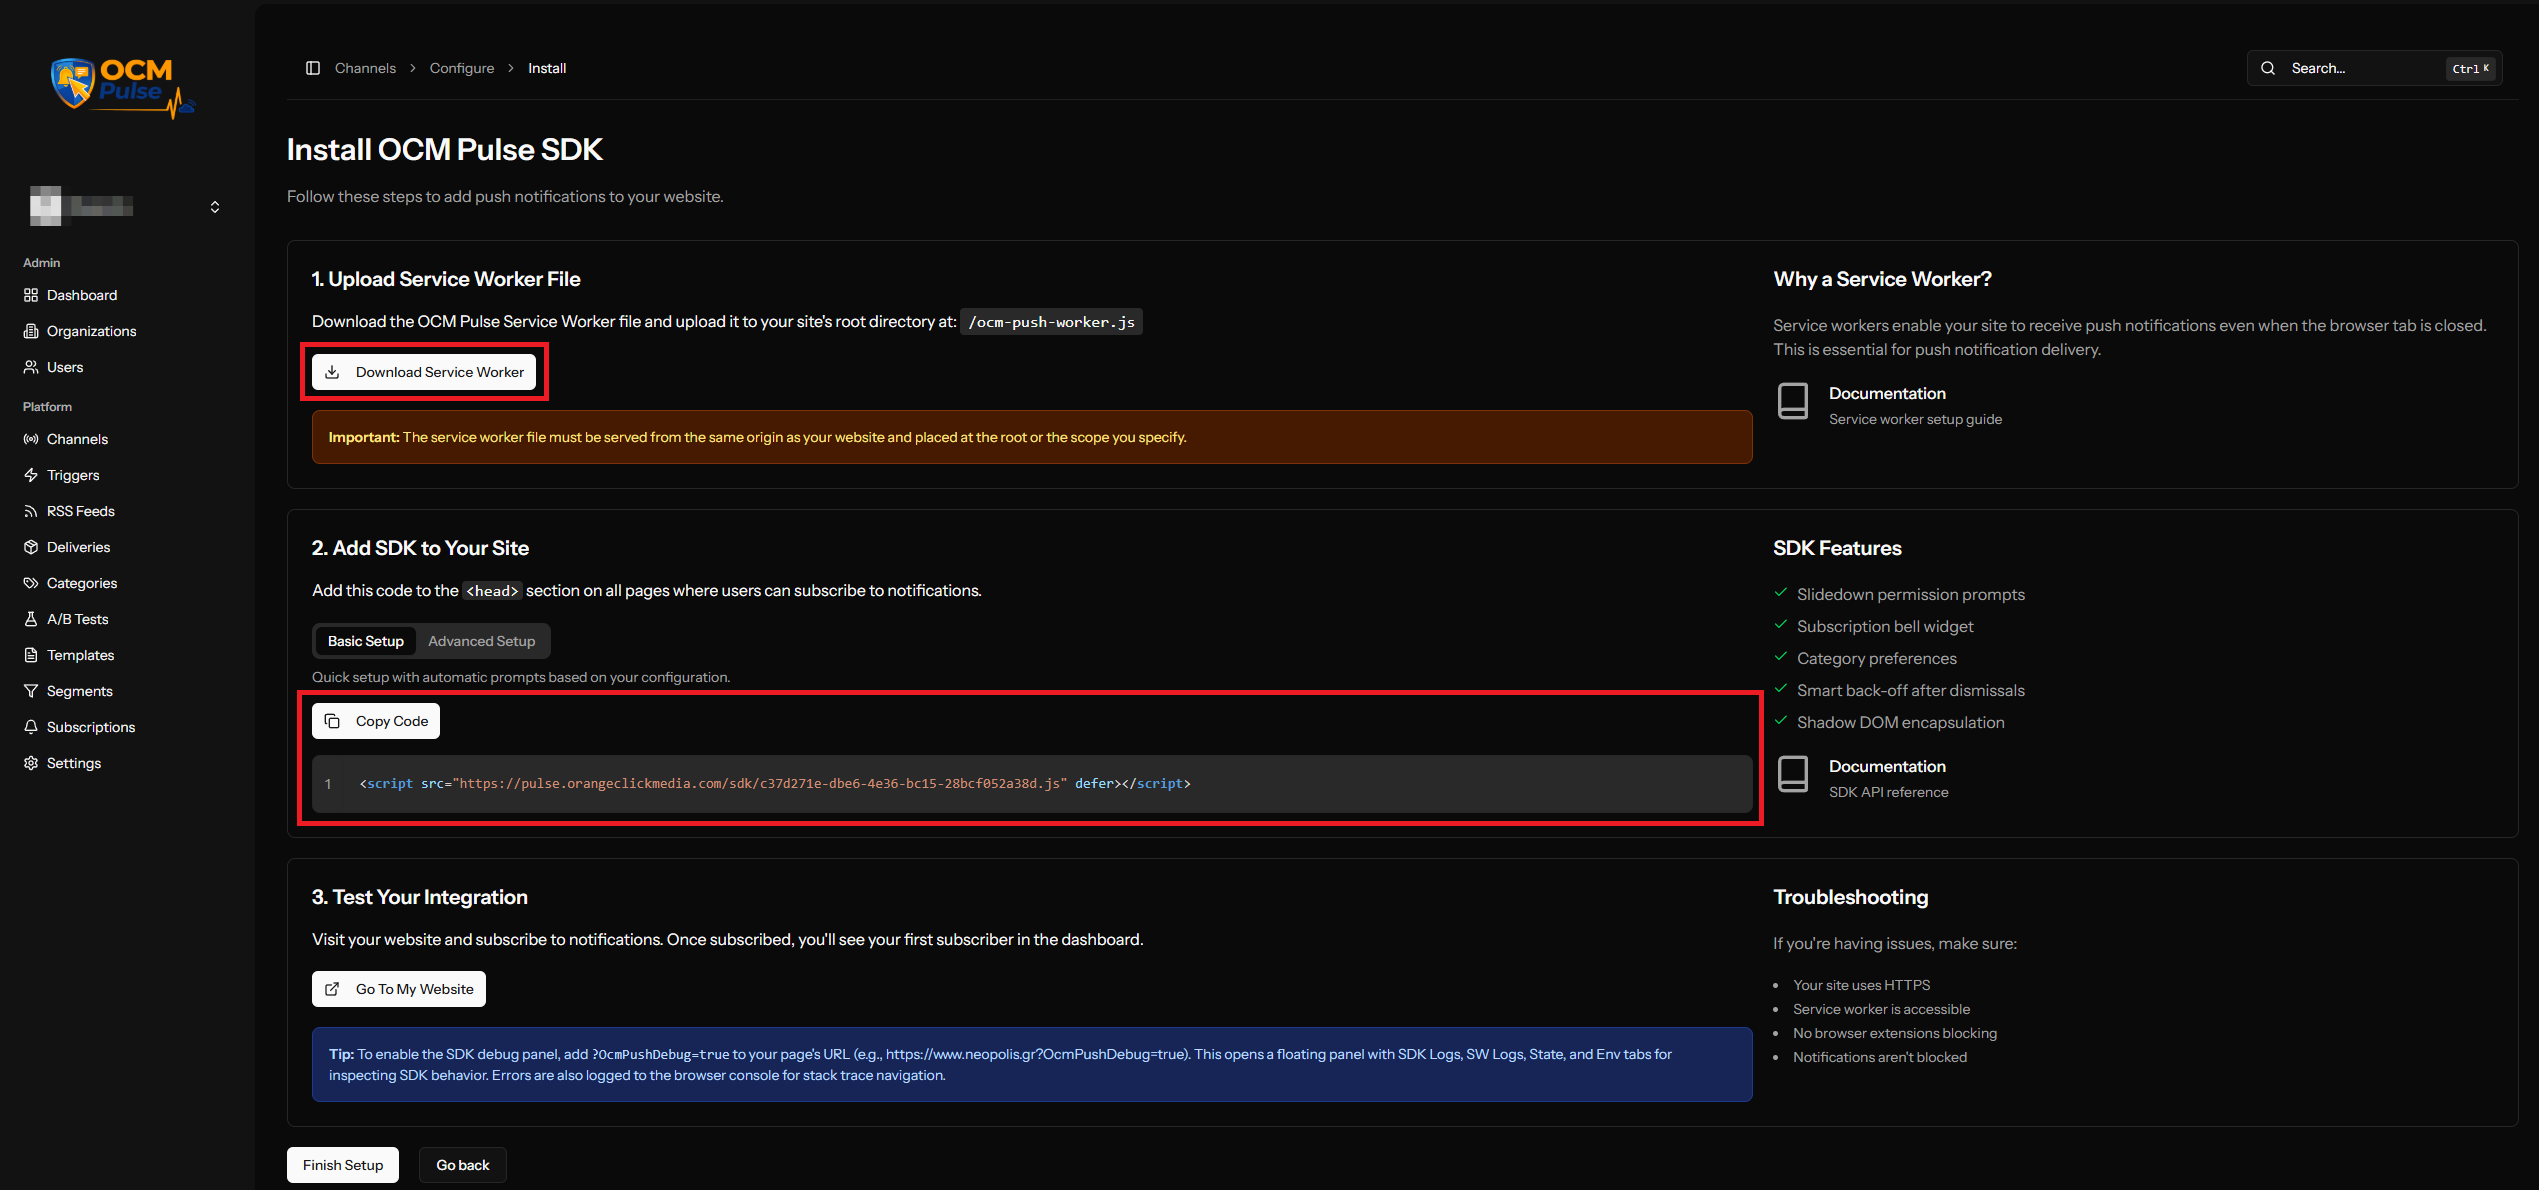
Verify: https://yoursite.com/ocm-push-worker.js should be accessible.
3.2 Add the SDK Script
Copy the embed code from the Installation page and add it to your website.
Option A: Add to <head> tag
<head>
  <!-- Your other head content -->
  <script src="https://ocm-push-domain.com/sdk/YOUR-APP-ID.js" defer></script>
</head>
Option B: Add before closing </body> tag
  <!-- Your page content -->
  <script src="https://ocm-push-domain.com/sdk/YOUR-APP-ID.js" defer></script>
</body>
3.3 Deploy Changes
Push the changes to your website.
Step 4: Test Your Installation
4.1 Open Your Website
In a new incognito/private browser window, visit your website.
4.2 Wait for Prompt
After the configured delay (5 seconds), you should see the permission prompt.
4.3 Subscribe
Click Allow on the permission prompt.
4.4 Verify Subscription
- Go back to OCM Pulse dashboard
- Navigate to your app's Subscriptions
- You should see your new subscription listed
If you subscribed before, use incognito mode or clear your browser's notification settings for your site.
Step 5: Send Your First Notification
5.1 Navigate to Triggers
In your app, click Triggers in the menu.
5.2 Configure Manual Trigger
Click Configure on the Manual Trigger card.
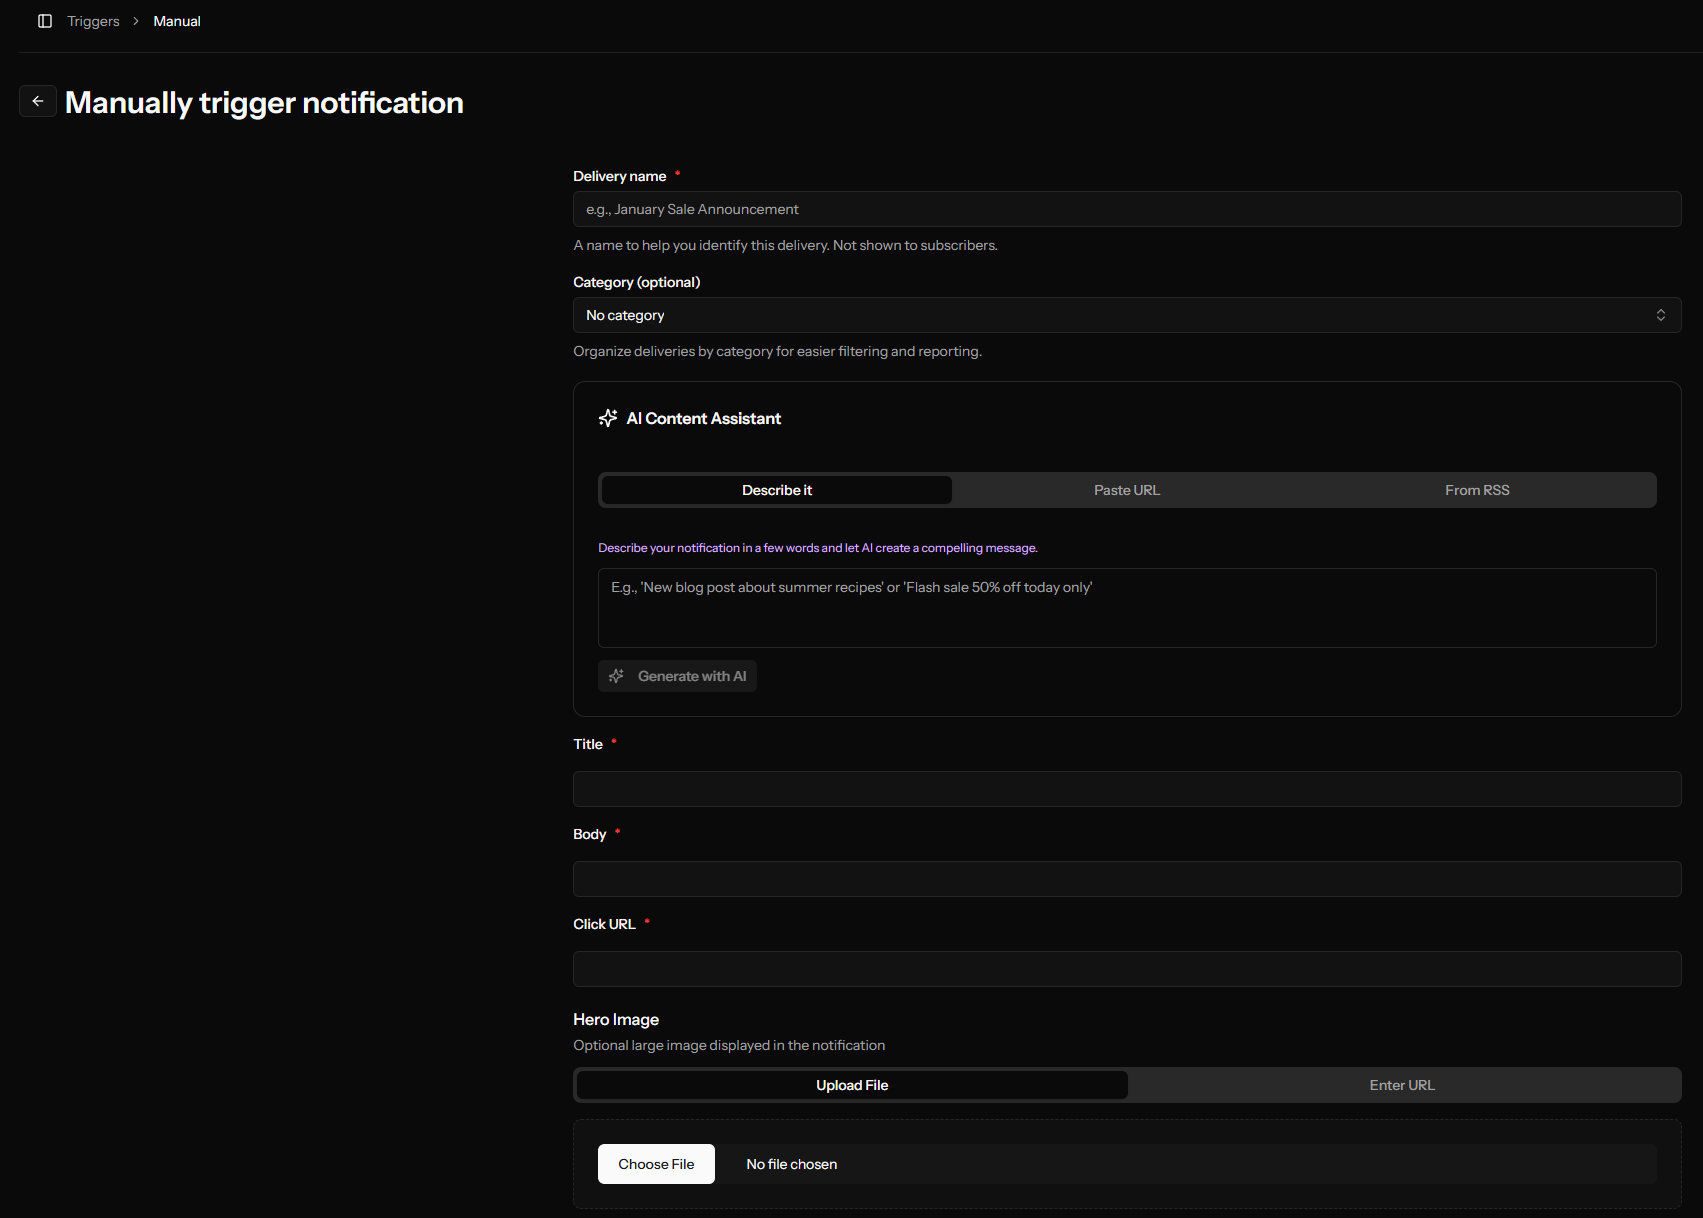
5.3 Create Your Notification
Fill in the form:
| Field | Example Value |
|---|---|
| Name | "Test Notification" |
| Title | "Hello from OCM Pulse!" |
| Body | "Your push notifications are working correctly." |
| URL | https://yoursite.com |
5.4 Send It
- Ensure "Send Immediately" is selected
- Click Send Notification
- Confirm when prompted
5.5 Check Results
- You should receive the notification on your device
- In OCM Pulse, go to Deliveries
- You'll see your notification with status "Success"
Congratulations!
You've successfully:
- ✅ Created an app
- ✅ Configured Web Push
- ✅ Installed the SDK
- ✅ Collected a subscriber
- ✅ Sent a notification
What's Next?
Customize Your Prompts
Configure permission prompts to increase opt-in rates.
Set Up Automation
Configure RSS triggers to automatically notify subscribers about new content.
Target Your Audience
Create segments to send relevant notifications to the right people.
Optimize Performance
Run A/B tests to find the best notification content.
Troubleshooting
Prompt Not Appearing
- Check browser console for errors (F12 → Console)
- Verify service worker is accessible
- Ensure you're using incognito mode
- Check if notifications are blocked in browser settings
Notification Not Received
- Check browser notification settings
- Verify you're subscribed in the dashboard
- Check Do Not Disturb settings
- Try a different browser
SDK Not Loading
- Check the script URL is correct
- Verify no JavaScript errors are blocking it
- Ensure HTTPS is enabled
- Check browser console for network errors
Need Help?
If you encounter issues:
- Check the troubleshooting sections in each guide
- Review the Web Push Installation guide
- Contact your administrator